
Views: 0 Author: Site Editor Publish Time: 2026-07-30 Origin: Site


Working with laminate materials leaves absolutely zero room for error on the job site. A single chipped edge easily ruins a costly countertop installation. One dark burn mark delays your entire cabinet refacing project, leading to wasted material and lost production time. Standard straight cutting tools routinely fail when applied to brittle surfaces like Formica or melamine. They strike the thin plastic layer too harshly, causing devastating tear-out. These delicate surface layers simply require specialized cutting angles to survive the rapid milling process intact. Upgrading to purpose-built trim router bits optimizes your edge quality immediately. You will drastically reduce manual filing time and eliminate frustrating rework entirely. These specialized tools ensure a seamless, professional finish on every single pass.
Tool selection dictates finish: Using a solid carbide flush trim bit significantly reduces the risk of chip-out compared to standard steel or low-grade carbide-tipped bits.
Geometry matters: Spiral flutes (up-cut/down-cut/compression) manage heat and chip ejection better than straight flutes, directly impacting edge smoothness.
Bearing placement defines the application: Choosing between a bottom-bearing flush trim bit and a top-bearing pattern router bit depends on template placement and workpiece visibility.
Technique compounds tool quality: Proper RPM management, feed direction, and bearing maintenance are required to prevent burning and adhesive build-up.
When a router bit tears out a chunk of Formica, the damage is irreversible. You cannot simply sand it away, use wood filler, or apply a patch. You must meticulously tear off the entire laminated sheet. This painful process often ruins the underlying MDF or plywood substrate, requiring extensive sanding or complete replacement of the base material. You waste expensive contact cement, scrap the costly laminate, and lose valuable hours of labor. Rework destroys project margins and pushes deadlines back by days. If you wait on a custom-ordered color or finish, a single slip could stall a kitchen remodel for weeks. Professional woodworkers and serious DIYers consistently encounter a few primary failure points when working this unforgiving, brittle material.
Chipping and Tear-out: This catastrophic failure happens when dull cutting edges catch the brittle top layer. Improper cutting angles also rip the material instead of slicing it cleanly. Because laminate lacks the interwoven grain structure of natural wood, it shatters under harsh perpendicular impacts.
Burning: Excessive friction literally melts the plastic components and the underlying adhesive. This dark discoloration usually occurs when you feed the tool too slowly along the edge. Improperly high RPM settings also cause rapid heat buildup, turning a clean edge into a scorched, unpaintable mess.
Inconsistent Overhangs: You will see uneven, wavy edges if your tool experiences bearing flex. Mismatched bit and collet sizes also cause severe tool chatter. This chatter creates a rippled finish along the countertop requiring extra manual labor to smooth out.
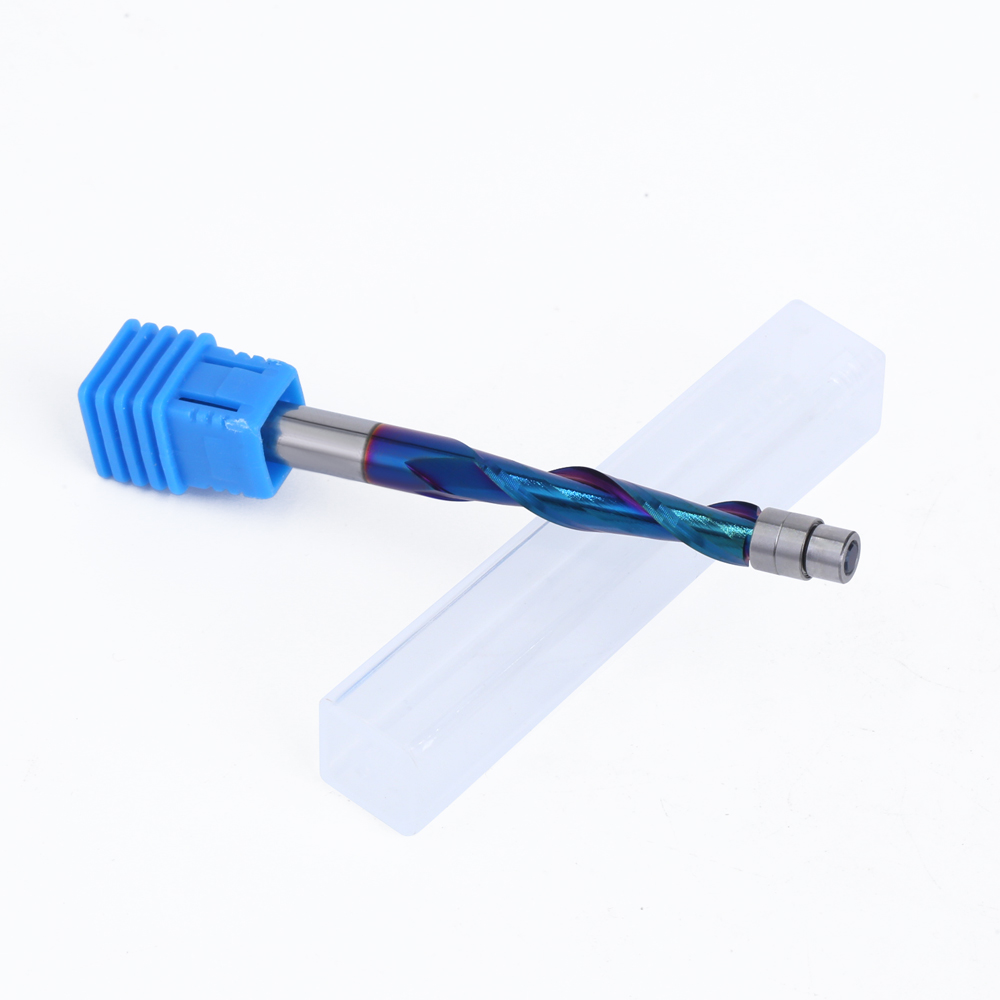
Choosing the correct profile determines your long-term success. Different project phases require vastly different tool geometries to achieve perfection.
A solid carbide flush trim bit represents the absolute gold standard for production environments requiring extreme longevity and flawless cuts. These specialized tools deliver ultra-clean results. Solid carbide absorbs high-frequency vibration much better than standard brazed alternatives. A traditional brazed tool features a softer steel body carrying small, welded carbide cutters. In stark contrast, a solid carbide tool is precision-machined from a single dense block of carbide material. It maintains a razor-sharp edge significantly longer under abrasive conditions. This sustained sharpness actively prevents the micro-chipping you often see on delicate melamine or high-pressure laminate edges.
Sometimes your template or finished reference edge sits securely on top of the workpiece rather than underneath it. In these specific scenarios, you need a high-quality pattern router bit. The top-bearing design allows for excellent, unobstructed visibility in complex routing jigs. You can clearly watch the bearing riding along the template from above. This top-down visibility prevents accidental gouging during intricate maneuvers. It works perfectly for delicate sink cutouts, custom speaker enclosures, or complex curved laminate panels where bottom-bearing visibility remains heavily obscured by the router base itself.
Specialty bits take your edge finishing entirely to the next level. A 3-in-1 laminate bit aggressively flushes the trim and adds a precise micro-bevel simultaneously in a single pass. Applying a slight 7-degree or 15-degree bevel effortlessly breaks the sharp, fragile 90-degree corner. This engineered micro-bevel prevents future chipping from daily impact, such as pots and pans striking a countertop edge. However, these advanced tools require incredibly precise depth setting. You must dial in your router base perfectly to ensure the bevel cuts at the exact right height without digging into the substrate below.
Not all cutting tools perform equally under pressure. You must strictly evaluate flute geometry, shank size, and bearing quality before starting your laminate project.
Straight flute tools offer a cost-effective, standard choice for casual, infrequent users. However, they strike the material at a harsh, perpendicular angle. This direct impact often shatters the brittle top decorative layer of the laminate. Alternatively, a down-cut spiral flute pushes the laminate firmly down against the glued substrate. This aggressive downward shearing action prevents top-edge chipping entirely. Never use an up-cut spiral bit for top-layer laminate trimming, as it aggressively pulls the thin material away from the glue line, causing catastrophic tear-out.
Flute Geometry Comparison
Geometry Type | Cut Quality on Laminate | Primary Benefit | Common Drawback |
|---|---|---|---|
Standard Straight | Fair | Low initial purchase price | High risk of top-layer tear-out |
Spiral Down-Cut | Excellent | Pushes material down, zero chipping | Slightly higher cost |
Spiral Up-Cut | Poor for top layer | Fast material removal | Pulls laminate away from substrate |
Always advocate for 1/2-inch shanks whenever your power tool allows. A thicker, heavier shank significantly minimizes tool deflection during heavy, continuous cuts. It physically prevents chatter. Less vibration directly translates to a glass-smooth laminate edge. Smaller 1/4-inch shanks inherently flex under lateral pressure, leaving rippled tool marks along the glued seam requiring tedious manual filing to remove.
Laminate work relies heavily on solvent-based or water-based contact cement. This aggressive adhesive remains sticky long after application and actively grabs ambient dust. You must prioritize fully shielded and sealed bearings. Open bearings quickly collect sticky glue and abrasive debris. Once contact cement enters the delicate bearing race, the bearing seizes completely. A seized bearing stops spinning and instantly burns a deep, unrepairable groove into your finished reference edge, ruining the workpiece. Investing in premium Trim Router Bits ensures you get high-quality sealed bearings built specifically for these messy, demanding environments.
Even the most expensive tools fail completely if you use improper techniques. Mastering your feed rate and cutting direction guarantees a flawless result every time.
You must carefully balance your speed settings for the specific bit diameter. Smaller diameter bits require much higher RPMs, often operating safely around 22,000 to 24,000 RPM. Larger diameter bits require slower speeds to maintain a safe rim speed. Moving the tool too slowly across the material causes massive heat buildup. This sustained friction literally melts the plastic laminate and burns the underlying wood substrate. Conversely, moving too fast forces the sharp cutters to chop rather than slice, causing immediate tear-out. Find a steady, continuous rhythm. Listen to the pitch of the router motor; it should hum steadily without bogging down.
Conventional feeding moves the tool against the rotation of the cutters. This represents the standard, safest approach for almost all woodworking tasks. The tool pushes back slightly against your hands, giving you firm, predictable control.
Climb cutting involves moving the tool in the exact same direction as the cutter rotation. We mention this as a high-risk, high-reward technique producing exceptionally clean cuts on highly brittle edges. However, the bit will aggressively try to pull the router out of your hands and race along the edge. You must maintain extreme physical control and take incredibly light passes. Only experienced professionals should attempt climb cutting, and only on the final, paper-thin finishing pass.
Never force your bit to cut large amounts of overhanging material. Excessive overhang severely overloads the tool, increases chatter, and heavily degrades the cutting edge. Follow these specific steps to stabilize your final cut:
Use a jigsaw, circular saw, or block plane to pre-trim the raw laminate sheet, leaving only 1/16-inch to 1/8-inch of overhang.
Apply a continuous strip of high-quality painter's tape directly over the final cut line on the decorative face.
Run your tool directly through the tape and the laminate simultaneously.
Carefully peel the tape away to reveal a perfectly supported, chip-free edge.
The tape firmly holds the fragile plastic fibers together while the cutters slice through them, acting as a zero-clearance surface.
Even careful planners encounter occasional operational issues. Address these problems immediately before they ruin your expensive materials.
You run the tool perfectly along the edge, but it leaves an ugly depression in the substrate.
Fix: Thoroughly clean all residual adhesive off the reference edge before routing. Check your tool for seized or sticky bearings. If the bearing spins freely, you are likely applying way too much lateral pressure against the router base. Let the tool gently guide itself along the edge without forceful pushing. The bearing should barely kiss the reference material.
Contact cement inevitably accumulates on the sharp cutters and the bearing housing during long runs.
Fix: Use specialized bearing lubricants and citrus-based cleaners designed specifically for dissolving contact cement. Do not use generic harsh solvents, as they might dissolve the internal bearing grease. In heavy production environments, stop and clean the cutters every few linear feet. A dirty bit cuts exactly like a dull bit.
Standard routers often will not fit inside assembled cabinet corners or tight backsplashes near walls.
Fix: Switch to a compact trim router featuring an offset base attachment. These specialized bases position the cutting bit at the very edge of the tool footprint, allowing you to reach deep into corners. If power tools simply cannot fit, do not force them. We suggest relying on manual filing techniques. Use a fine single-cut mill bastard file. Push the file only on the downward stroke to prevent lifting or chipping the delicate laminate layer.
Achieving a flawless laminate edge requires a calculated combination of high-grade materials and targeted geometry. You must match the tool profile to the specific task at hand. Standard straight edges rarely suffice for professional-grade Formica or melamine jobs.
For standard countertop installations, default to a down-cut solid carbide tool. This pushes the material firmly into the substrate and eliminates top-edge tear-out. For custom template work, prioritize a high-quality top-bearing pattern tool equipped with fully sealed bearings.
Take immediate action on your next project. Audit your current router collet size and upgrade to a 1/2-inch shank tool if your equipment allows it. Assess your typical material thickness to ensure proper cutter length. Finally, purchase a specialized down-cut or 3-in-1 bit rather than relying on generic multi-packs. Specialized geometry always outshines generalized convenience.
A: No. Without a dedicated guide bearing, you risk deeply gouging the substrate material. Straight bits also lack the optimal shear angle required for brittle laminate. They strike the plastic layer aggressively, which almost guarantees severe chipping and ruined edges along the cut line.
A: Burning usually stems from three main causes. Your bit may be dull, creating friction instead of slicing. Your RPM setting might be too high for the bit diameter. Alternatively, you may be feeding the router too slowly, allowing the rapid friction to melt the plastic and adhesive.
A: Use a double-bearing flush trim bit. This specialized tool features bearings on both the top and bottom of the cutting flutes. Alternatively, you can use a strict sequencing approach. Trim one side completely with a standard bottom-bearing tool before applying and trimming the second side to avoid tear-out.
A: Lifespan depends entirely on linear footage and the adhesive type used. Realistically, contact cement degrades cutting edges much faster than solid wood does. A premium solid carbide tool cleanly cuts hundreds of feet, but you must clean the adhesive build-up regularly to maintain edge sharpness.


