
Views: 0 Author: Site Editor Publish Time: 2026-07-29 Origin: Site


Standard straight and flush-trim bits easily handle around 80% of daily woodworking tasks. You rely on them constantly for quick edge treatments and basic dadoes. However, they quickly hit their physical limits when projects demand complex structural joints or highly specific aesthetic profiles. Pushing standard tools beyond their intended design causes severe burning, dangerous chatter, and ruined workpieces. You need purpose-built tools designed specifically for precision, repeatability, and unique material removal patterns. These specialized profiles achieve structural and aesthetic goals standard bits simply cannot safely or cleanly replicate. This guide provides a technical framework for evaluating when a project mandates specialized tooling. We explore how to carefully assess structural integrity, material constraints, and the overall cost-to-value ratio. Read on to master the exact transition point from standard edge-forming bits to precision-engineered alternatives.
Upgrading to specialty router bits is required when standard bits compromise joint strength, cause material tear-out, or require inefficient multi-step workarounds.
Project types dictate the tooling: Signage and engraving require a V groove router bit; custom jigs and hidden mounts necessitate a T slot router bit.
Evaluation must go beyond the profile shape; shank diameter (1/2" vs. 1/4"), carbide quality, and router table compatibility are critical decision-stage factors.
Large or complex specialty bits strictly require variable speed routers and multiple-pass implementations to mitigate safety risks and prevent bit failure.
Woodworkers often stretch standard tools past their breaking point. Identifying operational bottlenecks early saves both time and expensive materials. Standard bits plunge straight or follow simple bearing paths. When you force them to carve deep coves or complex locking joints, you quickly introduce chatter. Chatter creates uneven cuts and dangerous vibrations. Burning also occurs frequently because standard geometries struggle to evacuate chips efficiently during complex maneuvers.
Some makers attempt risky workarounds to avoid buying dedicated tools. They try "faking" an architectural profile using multiple staggered passes. This approach rarely yields clean results. You end up spending hours sanding out ridges and burn marks. Furthermore, creating a structural joint manually compromises its mechanical strength. By investing in specialty router bits, you eliminate these aesthetic and structural risks entirely. Dedicated tools remove material efficiently and leave a surface ready for final finishing.
Evaluating the return on investment requires a practical framework. If a client commissions a single piece of custom furniture, purchasing a highly specific molding bit makes sense. You build the tool cost into the project estimate. For ongoing shop use, high-quality specialized bits reduce your labor hours drastically. Calculate the time spent sanding sloppy workarounds against the upfront cost of the correct tool. The dedicated bit almost always wins the cost-benefit analysis.
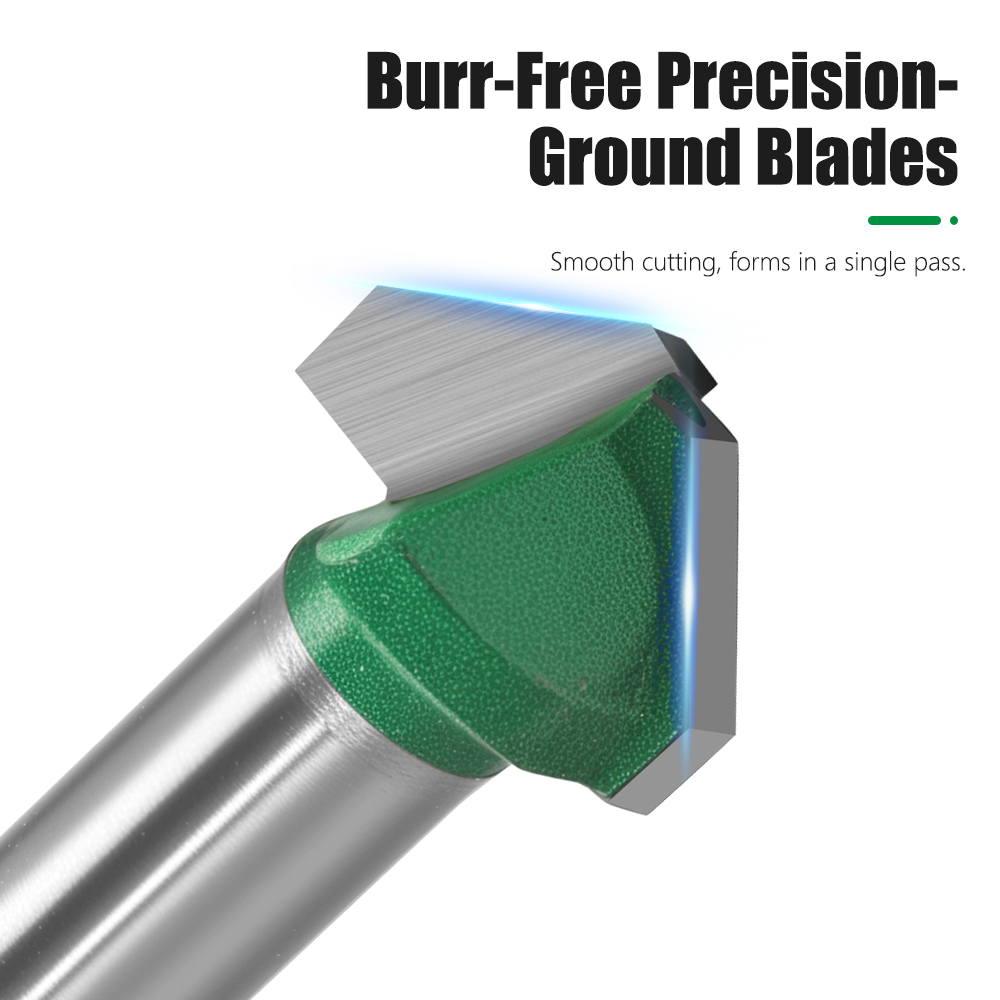
Sign making and decorative fluting demand exceptional plunge precision. You cannot achieve crisp typography using a standard straight cutter. Deep engraving, edge chamfering, and CNC lettering require a specialized geometric approach. A V groove router bit handles these exact applications flawlessly. It tapers down to a fine point, providing the necessary depth-to-width ratios for sharp typography.
Angle selection determines your final aesthetic. A 60-degree angle works beautifully for intricate, small text. It plunges deeply without widening the cut excessively. Conversely, a 90-degree angle excels for bolder lettering and edge chamfering. Standard bits simply cannot plunge to these fine points without destroying the surrounding wood fibers.
Creating keyhole slots for floating shelves or routing custom tracks for shop jigs presents a unique mechanical challenge. You need a tool capable of plunging into the material and then widening the channel beneath the surface. This plunge-and-widen action remains physically impossible for standard straight bits.
A T slot router bit easily accomplishes this hidden joinery. However, implementation requires extreme care. You must establish precise entry and exit points. You also need steady, consistent feed rates. Pausing mid-cut often traps the bit or snaps its delicate neck inside the dense hardwood. For the best results, clear the initial straight channel first, then use your specialized cutter to form the wider base slot.
Crafting custom crown molding, baseboards, or complex furniture edges requires absolute consistency. Replicating historical molding profiles manually using separate roundover and cove bits wastes immense amounts of time. Misaligning just one pass ruins the entire trim piece.
Multi-profile cutters, such as Roman Ogee or large architectural bits, solve this problem entirely. They ensure consistent, repeatable geometry across long spans of material. You achieve a complex, sweeping profile in a single setup. This efficiency eliminates multi-tool setups and drastically reduces your margin for error.
Building high-quality drawers, cabinets, and 90-degree interlocking corners demands superior structural integrity. Butt joints rely purely on modern adhesives, which eventually fail under stress. Advanced joinery maximizes both glue surface area and mechanical tensile strength.
Dovetail and lock miter profiles physically restrict joint failure in specific directions. A lock miter creates an interlocking 45-degree angle. It exponentially increases the glue surface while mechanically preventing the boards from sliding during clamp-up. This type of specialized joinery transforms a mediocre cabinet box into a piece of heirloom furniture.
Selecting the right specialized tool involves more than matching a visual profile. You must understand the underlying physics and metallurgy of modern woodworking tools. Shank size plays a massive role in safety and cut quality. Always prioritize 1/2-inch shanks over 1/4-inch shanks for larger specialized bits. A 1/2-inch shank contains significantly more metal mass. This increased mass drastically reduces operational vibration. It minimizes deflection during heavy cuts and yields much cleaner edges, especially when you route dense hardwoods.
Material composition directly dictates tool longevity and performance. Woodworkers generally choose between three distinct material grades for their cutters.
Router Tool Material Comparison
Material Type | Durability | Best Application | Heat Resistance |
|---|---|---|---|
High-Speed Steel (HSS) | Low | Softwoods, occasional DIY use | Poor |
Carbide-Tipped | High | Hardwoods, daily shop use | Excellent |
Solid Carbide | Maximum | MDF, plywood, CNC production | Superior |
We heavily recommend carbide options for MDF, plywood, and dense hardwoods. Plywood contains highly abrasive glue lines. These glues dull High-Speed Steel incredibly fast. Carbide withstands the extreme heat generation and abrasive wear associated with engineered materials.
Finally, evaluate flute geometry and shear angles. Up-cut configurations evacuate chips efficiently out of mortises but can cause tear-out on the top veneer. Down-cut configurations press fibers down, leaving a pristine top edge, though they pack chips into the cut. Specialized shear-angle configurations slice the wood fibers at an angle rather than chopping them head-on. This slicing action drastically reduces tear-out on highly figured woods.
Operating specialized cutting tools demands strict adherence to safety protocols. Not all tools belong in a handheld router. You must define clear boundaries between handheld tasks and router table constraints. Large panel raisers, extensive molding profiles, and lock miters strictly require a rigid router table. They also require a sturdy fence for safe operation. Attempting to freehand a heavy, wide-diameter cutter invites disastrous kickback and severe injury.
Rotations Per Minute (RPM) limitations present another critical safety factor. You must map the tool diameter to the maximum safe operating speed. Heavy specialized cutters require variable speed routers. You must dial down the speed to prevent catastrophic tool failure.
Under 1 inch diameter: Safe up to 24,000 RPM.
1 to 2 inches diameter: Limit to 18,000 RPM.
2 to 2.5 inches diameter: Limit to 16,000 RPM.
Over 2.5 inches diameter: Limit to 12,000 RPM maximum.
Never ignore the multi-pass strategy. Attempting to hog out a massive profile in a single pass ruins your workpiece and endangers your safety. Detail the necessity of taking shallow, successive passes rather than full-depth cuts.
First Pass: Remove the bulk of the waste material, leaving roughly 1/8 inch for the final profile.
Second Pass: Cut closer to the final dimension, monitoring heat buildup and chip evacuation.
Final Pass: Skim the last 1/16 inch of material at a steady feed rate to eliminate burn marks.
This systematic approach preserves the sharp edge of your tool, prevents the motor from bogging down, and ensures a glass-smooth finish.
When expanding your tool collection, assess your actual project volume before buying. Beginners often ask if they should buy massive, curated sets or individual premium tools. Guidelines for buying individual premium bits usually favor immediate project needs. Buying a 50-piece budget set leaves you with 40 tools you never use. Instead, purchase individual, high-quality items precisely when a project requires them. Over time, you build a custom arsenal perfectly tailored to your specific workflow.
Brand and tolerance verification separate professional-grade tools from dangerous knockoffs. Look closely for manufacturers providing transparent specifications on balance tolerances. Excellent balance prevents the micro-vibrations causing rough cuts. Examine the carbide thickness carefully. Thicker carbide allows for multiple future sharpenings, extending the lifecycle of your investment.
Always verify anti-kickback designs. Premium manufacturers engineer the steel body to limit the chip size the cutter can grab per revolution. This physical limitation drastically reduces the chance of the material violently kicking back toward you during a heavy cut.
Specialized router tools are not merely optional accessories for your shop. They stand as functional necessities for advanced woodworking, robust joinery, and architectural fabrication. Pushing standard tools past their limits only results in wasted material and compromised safety.
Base your purchase on project requirements: Never buy a complex profile tool unless a specific task or client commission demands it.
Prioritize critical safety specs: Always opt for 1/2-inch shanks and anti-kickback body designs when dealing with wide-diameter profiles.
Match materials intelligently: Select carbide-tipped or solid carbide options to withstand the abrasive heat of plywood, MDF, and dense hardwoods.
Respect RPM limits: Always dial down your variable speed motor when spinning large panel raisers or molding cutters.
By adopting these technical evaluation standards, you elevate the structural integrity and aesthetic quality of every piece you build.
A: Yes, but you must ensure the tool is specifically rated for CNC RPMs and feed rates. Verify the precise plunge geometry matches your software toolpaths to prevent calculation errors and ruined materials.
A: Burning typically indicates the feed rate is too slow, the RPM is too high, or chip evacuation is blocked. Pre-routing a standard straight groove before using the specialized cutter easily alleviates most material clearance issues.
A: For one-off projects, a mid-tier carbide-tipped option is often sufficient. However, for complex joinery requiring strict tolerances (like lock miters), budget tools often fail to align properly, entirely ruining the workpiece.


