
Views: 0 Author: Site Editor Publish Time: 2026-07-31 Origin: Site


The distinction between amateur woodworking and professional-grade millwork relies heavily on the precision of edge profiling and template routing. Relying solely on router table fences or freehand techniques introduces unacceptable margins of human error, leading to profile inconsistencies, workpiece tear-out, and ruined stock. Bearing-guided tooling eliminates these variables by using a physical reference point. This guide breaks down how to evaluate, select, and implement bearing-guided Router Bits to ensure repeatable, flawless edge profiles while mitigating common tooling failures. By understanding the mechanical relationship between the cutting edge and the guide bearing, operators can drastically reduce sanding time and eliminate the risk of gouging expensive hardwoods during complex template operations.
Bearing Placement Dictates Workflow: The choice between top-bearing (shank-mounted) and bottom-bearing (end-mounted) router bits strictly determines whether your template sits above or below the workpiece.
Tooling Rigidity Matters: Opting for 1/2-inch shanks over 1/4-inch shanks significantly reduces deflection and vibration, which is critical for clean edge profiles on dense hardwoods.
Maintenance is Non-Negotiable: Router bit guide bearings are consumable components; failing to clean and inspect them leads to bearing seizure, which will instantly burn or gouge the workpiece.
Application-Specific Geometry: Selecting the correct shear angle and profile type—such as utilizing round nose router bits with bearings for fluting or core box work—directly impacts the amount of sanding required post-routing.
The Collet Gap Rule: A critical setup mistake is "bottoming out" the router bit in the collet; leaving a small gap prevents heat-induced binding and guarantees precise bearing alignment.
The mechanical function of a guide bearing is straightforward but highly effective. It rides along a template or the un-routed portion of the workpiece, physically restricting the lateral depth of cut. Standard flush trim bits feature a 1:1 ratio between the bearing diameter and the cutting diameter, ensuring the cut perfectly mirrors the template. Offset bearings are used for rabbeting, where the bearing is intentionally smaller than the cutting diameter to create a stepped shoulder. Bearing-guided manual routing differs significantly from CNC routing. Physical guide bearings are redundant and potentially hazardous on automated CNC machinery, which relies entirely on pre-programmed coordinate paths. For CNC applications, operators must opt for non-bearing equivalents to prevent mechanical interference and programming errors.
Top-bearing, or shank-mounted, bits are ideal for handheld routing where the template is secured to the top of the workpiece. This setup provides maximum visibility, allowing the operator to watch the bearing track along the template edge. Bottom-bearing, or end-mounted, bits are typically preferred for router table operations or when the template is mounted beneath the stock. Dual-bearing bits feature bearings on both the top and bottom of the cutting flutes. They are excellent for complex grain directions, allowing the user to flip the workpiece and avoid climb cutting without needing to change the bit or remount the template.
When selecting tooling, carbide quality is a primary decision criterion. Micro-grain carbide holds a sharper edge longer than standard carbide, but it is more brittle and susceptible to chipping if dropped. Shear angles also play a critical role in cut quality. Straight flutes chop wood fibers at a perpendicular angle, which can cause blowout on tear-out-prone species. Up-cut, down-cut, or slight shear angles slice the fibers gradually. Slicing reduces tear-out and produces a cleaner finish that requires minimal post-routing sanding.
Shank sizing directly impacts scalability and safety. 1/2-inch shanks offer significantly more mass, reducing chatter and heat buildup during heavy material removal. They are essential for large-diameter edge-forming bits where rotational forces are high. 1/4-inch shanks are necessary for compact palm routers used for light edge breaking, but they should be avoided for heavy-duty routing tasks due to the risk of shank deflection or snapping under load.
Bearing construction dictates longevity and performance. Sealed bearings prevent fine dust ingress much better than shielded variants, making them superior for woodworking environments. When purchasing tooling, evaluate the availability of replacement Router Bit Guide Bearings and retaining collars from the manufacturer. High-quality bits allow for easy bearing swaps using a simple hex key, extending the life of the carbide cutter.
Flush trimming requires matching the exact dimensions of an MDF, plywood, or acrylic template. A common implementation risk is bearing indentations on softwoods, where the pressure of the bearing crushes the wood fibers along the reference edge. Mitigation strategies include using oversized bearings to distribute the pressure or applying hardened UHMW tape to the template edge to provide a smoother, wider tracking surface.
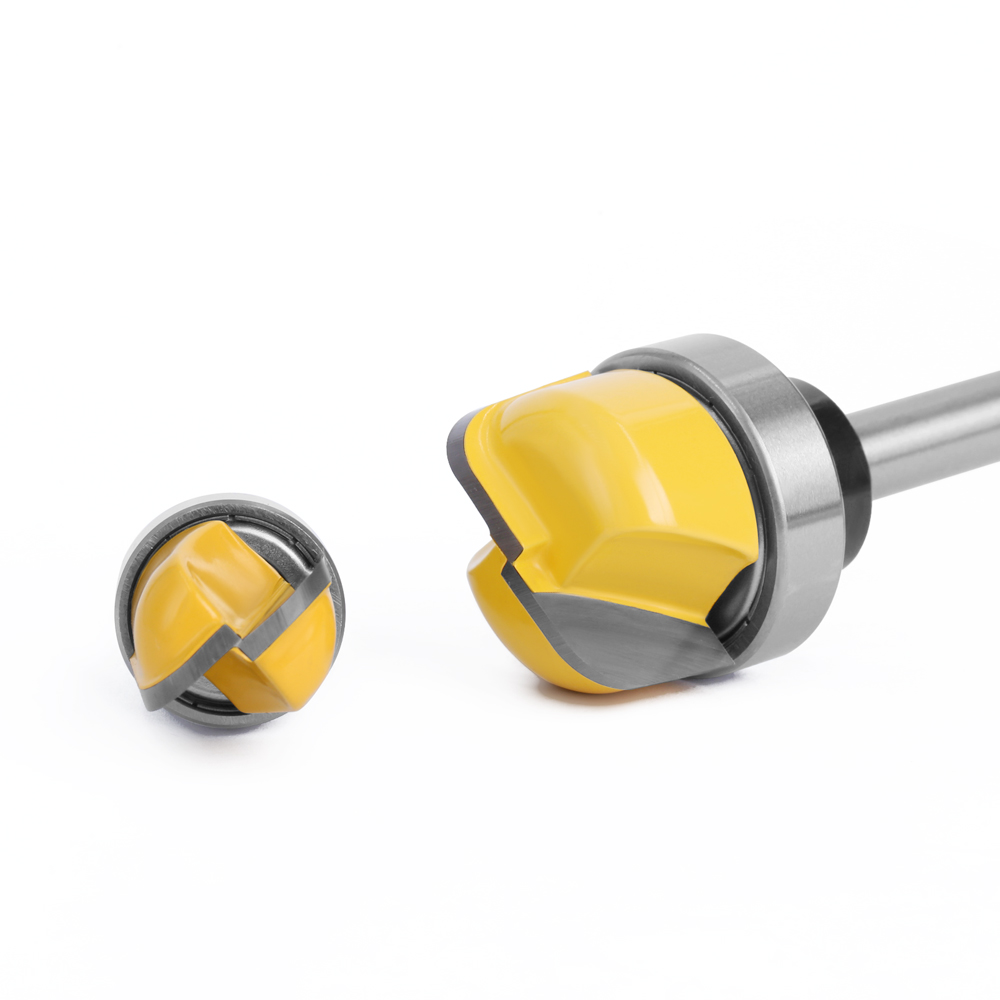
Round Nose Router Bits with Bearings are ideal for fluting or core box work. They are used to create precise flutes in columns, cut juice grooves in cutting boards, or pocket dishes and trays where the bearing follows an outer acrylic template or a custom internal jig. The bearing ensures the groove remains perfectly parallel to the template, eliminating the need for complex edge guides.
Standard edge-forming profiles like chamfers, roundovers, and ogees are used to break sharp edges or add decorative millwork to furniture parts. You can leverage height adjustments to use partial profiles. For example, adjusting a roundover bit downward creates a stepped bead profile, while adjusting a chamfer bit controls the exact width of the bevel. This versatility allows a single bit to produce multiple distinct edge treatments.
Ensure the bearing has full, flat contact with the reference edge. Partial contact can lead to slipping, causing the bit to bite into the template and resulting in catastrophic workpiece gouging. For deep profiles, use a multi-pass strategy. Remove bulk material with a straight bit, bandsaw, or table saw first, leaving only 1/16-inch to 1/8-inch of material for the final pass with the bearing-guided bit. This reduces heat, extends bit life, and ensures a glass-smooth finish.
Inspect the template edge for any bumps or voids, as the bearing will transfer these imperfections directly to the workpiece.
Set the router depth so the bearing rides exactly in the center of the template thickness.
Lock the plunge base or fixed base securely to prevent depth drift during the cut.
Perform a dry run with the router powered off to ensure clamps or bench dogs will not interfere with the router base.
Fully bottoming out a router bit shank in the collet introduces severe safety and precision risks. Insert the shank completely until it hits the bottom of the armature shaft, then pull it back out approximately 1/16-inch to 1/8-inch before tightening the collet nut. This prevents thermal expansion from locking the bit in place and ensures the collet can compress evenly around the shank for maximum grip.
Router speed must be adjusted based on the overall cutting diameter of the bit. Running a large panel-raising bit at maximum speed will cause severe burning and vibration. Small bits under 1 inch can run safely at 24,000 RPM. Large bits over 2 inches must be dialed down to 12,000-16,000 RPM to prevent burning and ensure operator safety.
Bit Diameter | Recommended RPM | Typical Application |
|---|---|---|
Under 1" | 22,000 - 24,000 | Small roundovers, flush trim |
1" to 2" | 18,000 - 22,000 | Medium chamfers, large roundovers |
2" to 2-1/2" | 16,000 - 18,000 | Crown molding profiles |
Over 2-1/2" | 12,000 - 16,000 | Panel raisers, large horizontal bits |
Always feed against the rotation of the bit. For external hand routing, this means moving the router counter-clockwise around the outside of the workpiece (left-to-right). Secure the workpiece with non-slip pads, double-sided woodworking tape, or low-profile clamps to prevent template shifting. Route end grain first, then long grain, so the long grain pass cleans up any blowout or tear-out that occurs at the corners.
Diagnostic steps are critical before powering on the router. Spin the bearing manually before chucking the bit. Listen for grinding, squeaking, or feeling for excessive lateral play. A healthy bearing should spin freely but stop relatively quickly due to the internal grease. If it spins endlessly and sounds dry, or if it feels gritty, replace it immediately before it seizes and burns the template.
Remove pitch, adhesive residue, and resin buildup using dedicated bit cleaners or citrus solvents. Avoid soaking bearings in harsh solvents like acetone or mineral spirits, as these will strip the internal grease from sealed bearings. Use specialized dry lubricants like PTFE for the bearing exterior to avoid transferring wet oils to raw wood, which can ruin subsequent finishing processes.
Investing in high-quality bearing-guided tooling is essential for achieving precise, repeatable edge profiles and template work. The initial cost of premium carbide and sealed bearings is easily offset by the reduction in ruined stock and sanding time.
Audit your current tooling library and replace any 1/4-inch shank edge-forming bits with 1/2-inch shank equivalents for better stability.
Implement a strict cleaning schedule, removing pitch and resin from bearings after every major milling session.
Purchase a backup set of replacement bearings and retaining screws to avoid project delays when a bearing inevitably wears out.
Adopt the multi-pass routing strategy for all profiles deeper than 3/8-inch to preserve carbide life and prevent tear-out.
A: Bottoming out the bit causes thermal expansion to lock the shank against the bottom of the armature shaft. This prevents the collet from tightening properly, leading to bit slippage, severe vibration, and making the bit nearly impossible to remove after use.
A: No. Bearing-guided bits are redundant and hazardous on CNC machines. CNCs rely on pre-programmed coordinate paths, and a physical bearing can interfere with the cut path, cause friction burns, or break off at high feed rates.
A: Clean your bearings after every major project or whenever you notice pitch, resin, or adhesive buildup. Keeping them clean prevents the bearing from seizing, which would instantly burn your template and ruin the workpiece.
A: Routing end grain first often causes the wood fibers to blow out or tear at the trailing corner. By routing the long grain immediately after, the bit cuts away that damaged corner, leaving a perfectly clean edge all the way around.
A: A 1/2-inch shank offers significantly more mass and surface area for the collet to grip. This reduces chatter, minimizes heat buildup, and prevents the shank from deflecting or snapping under heavy cutting loads.
A: To prevent bearing indentations on softwoods like pine or cedar, use a wider template to distribute the pressure, apply hardened UHMW tape to the template edge, or use an oversized bearing for the initial passes.


