
Views: 0 Author: Site Editor Publish Time: 2026-07-09 Origin: Site


Fabricating custom cabinet doors requires absolute precision. Even a millimeter of misalignment or a slight variation in feed rate can ruin expensive hardwood stock. Tear-out and severe burn marks quickly destroy project timelines and waste valuable materials. Achieving flawless results demands strict attention to detail and a deep understanding of your equipment.
Large-diameter raised panel Router Bits introduce significant rotational mass, vibration, and torque into your workflow. Incorrect setup compromises the aesthetic quality of the panel profile. It also poses severe safety risks, increases operator fatigue, and places unnecessary strain on your router motor and lift. Managing these physical forces is critical for clean, repeatable cuts.
Achieving flawless panel profiles requires a systematic approach. You must configure your router table correctly, manage RPM precisely, and execute strategic multi-pass cuts. This guide breaks down the technical setup parameters, material preparation, and evaluation criteria for selecting and running professional-grade panel tools in a production or high-end custom shop environment.
RPM Management is Non-Negotiable: Large raised panel router bits (3 to 3 ½ inches in diameter) must be run at significantly reduced speeds—typically between 10,000 and 12,000 RPM—to prevent burning and ensure safe operation.
Multi-Pass Execution Dictates Quality: Attempting a full-depth profile in a single pass guarantees chatter, motor bog-down, and tear-out; a calibrated three-to-four pass strategy is required for clean finishes.
Table and Collet Prerequisites: Safe operation requires a heavy-duty router table, a minimum 3-horsepower router motor, and strictly 1/2-inch shank router bits to handle high lateral forces.
The 1/16-Inch Shank Bottoming Rule: Never bottom out the bit shank in the collet. Always insert the shank fully and pull it back up approximately 1/16-inch before tightening to ensure proper collet grip and prevent heat-induced locking.
Profile Synergy: Integrating complementary edge treatments ensures cohesive design language and structurally sound joinery across the cabinet assembly.
High-quality cutting tools rely on specific structural requirements to perform under heavy loads. The shear angle dictates how the carbide edge slices through wood fibers. A proper shear angle reduces cutting resistance and minimizes tear-out, especially on difficult end-grain passes. Radial clearance prevents the non-cutting edge from rubbing against the wood. This eliminates friction-induced burn marks that are notoriously difficult to sand out of complex profiles.
Thick micro-grain carbide provides durability and maintains a sharp edge longer through hundreds of linear feet of hardwood. Anti-kickback designs limit the depth of cut per revolution, preventing the cutter from grabbing the stock too aggressively. These features directly translate to reduced sanding time and smoother end-grain cuts. When evaluating tooling, inspect the brazing quality where the carbide meets the steel body; voids here indicate weak manufacturing that will fail under production stress.
Safe operation requires specific baseline hardware. You cannot use 1/4-inch shanks for this application. The lateral forces generated by large panel cutters will snap a thin shank instantly, creating a massive safety hazard. You must use a 3+ horsepower variable-speed router. This provides the necessary torque to spin heavy mass without bogging down when encountering dense grain or knots.
A heavy, rigid, flat router table is equally important. Cast iron or thick phenolic tops absorb vibration effectively. A flimsy table will transfer vibration directly into the workpiece, causing chatter marks across the entire panel reveal. Furthermore, a precision router lift is highly recommended. Adjusting a 3-pound router motor by hand under a table makes micro-adjustments nearly impossible. A geared lift allows for adjustments down to the thousandth of an inch.
You must choose between cutters with integrated back-cutters and standard single-sided versions. Back-cutters automatically machine a flush back panel profile. This allows the panel to fit standard 1/4-inch frame grooves in a single setup. It guarantees the front face of the panel remains perfectly flush with the door frame, which is critical for inset cabinetry.
Standard bits require a multi-setup process. You must route the front profile, flip the panel, and route a separate back rabbet using a straight bit or a dedicated rabbeting bit. Back-cutters save significant production time but demand more horsepower and a larger table opening. They also require thicker stock—typically 3/4-inch or 5/8-inch—to leave enough material for the tongue after both sides are machined.
Horizontal bits lay flat on the table. They are generally safer and accommodate wider profiles. However, they require a large table opening and a heavy-duty lift to handle the diameter. Vertical bits stand upright. They allow for smaller table openings and require less horsepower because the cutting diameter is much smaller.
The trade-off with vertical bits is stability. Vertical routing requires tall fences (at least 5 inches high) and specialized vertical coping jigs to keep the panel perfectly 90 degrees to the table. It carries a higher risk of the workpiece tipping during the cut, which instantly ruins the panel. Most professionals prefer horizontal setups for their inherent stability and superior surface finish.
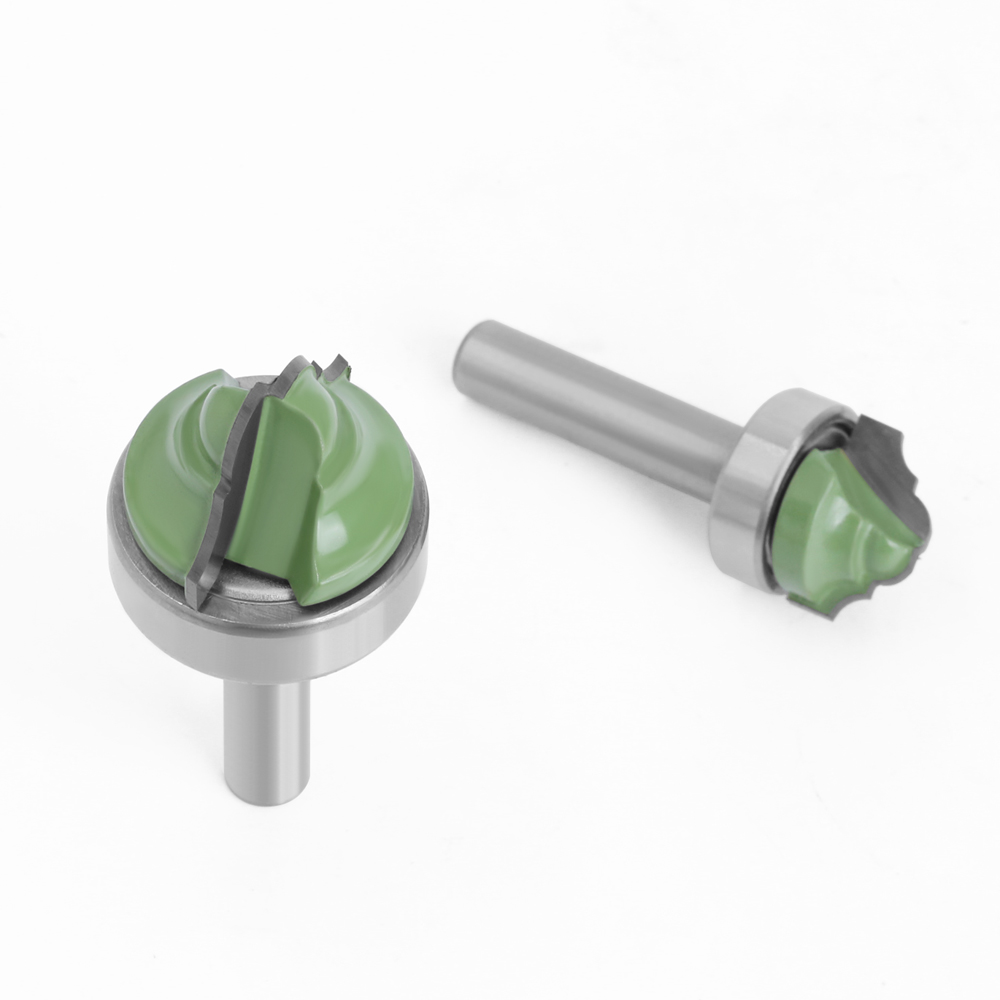
Choosing between traditional straight bevels and curved ogee profiles depends on architectural style and finishing requirements. Straight bevels offer clean, modern shadow lines. They are significantly easier to sand and finish because you can use flat sanding blocks. Curved ogee profiles provide a classic, traditional look that fits well in historic or ornate homes.
However, the sweeping curves complicate sanding. You must use custom-shaped sanding pads to avoid flattening the crisp details. Stain and paint tend to pool in the deep recesses of an ogee profile, requiring careful wiping and brushing techniques. Consider the finishing process and the skill level of your finishing department before committing to a complex shape.
Pairing raised panels with matching stile and rail frames creates a cohesive design. You can use Double Roman Ogee Router Bits to create complex, classic edge details on the outside of the door frames or as a complementary detail on drawer fronts. These details transition seamlessly into the panel reveal, creating a unified look.
Setting up these tools requires precise height adjustment. The profile must align perfectly with the cope cut on the rail ends. Test cuts are mandatory to ensure the joint closes tightly without gaps. When using these profiles, ensure your feed rate is consistent; pausing will cause immediate burning in the tight coves of the Roman Ogee shape.
Sharp edges on cabinet components are fragile and prone to chipping during assembly and daily use. You should use Corner Round Router Bits to soften the back edges of panels before inserting them into the frames. This prevents splintering when the panel expands and contracts.
Softened edges also improve finish adhesion. Paint and clear coats naturally pull away from sharp 90-degree corners, leading to premature wear. Rounding the edges ensures a flush, rattle-free fit within the door frame groove. It adds a professional touch to the final product and reduces the risk of injury during handling.
Boards must be jointed and planed perfectly flat before routing. Minor cupping or twisting causes uneven profile depths along the panel edge. If the board rocks even slightly on the table, the cut will be inconsistent, and the tongue will not fit the frame groove properly. Wood must also acclimate to your shop's humidity for at least 48 hours before milling.
Machining wet or unacclimated wood leads to warping after assembly. As the panel dries, it shrinks, potentially exposing unfinished wood lines along the frame. Ensure your stock is flat, square, and dimensionally stable before starting the setup process. Use a reliable moisture meter to verify the wood is between 6% and 8% moisture content.
Routine maintenance prevents catastrophic failures. Inspect the router collet before inserting any tool. Dust, pitch, or rust inside the collet causes bit slippage. It also introduces runout, leading to severe vibration and poor cut quality. Clean the collet with a brass brush and mineral spirits regularly.
Never apply oil or grease to the shank or collet interior. The friction fit must remain completely dry to grip the shank securely under heavy load. If the collet shows signs of scoring or if it fails to release the bit easily after loosening the nut, replace it immediately. A worn collet is a major safety hazard.
Large cutters generate a massive volume of chips in a matter of seconds. Poor dust collection ruins cuts. Chips pack behind the fence and push the workpiece outward. This throws off the cut depth and ruins the profile. Set up dual dust collection for optimal results.
Connect a high-CFM hose (minimum 4-inch diameter) to the cabinet port to catch downward debris.
Connect a second hose (2.5-inch diameter) to the fence port to clear chips directly from the cutting zone.
Ensure your dust collector has a minimum rating of 1000 CFM to handle the heavy chip load produced by panel routing.
Running a large cutter at high speed is extremely dangerous. Centrifugal force can cause the tool to disintegrate, throwing carbide shrapnel across the shop. You must follow a strict mathematical and safety-based framework for router speed. Always adjust the variable speed dial before turning on the power.
Bit Diameter | Recommended RPM Range | Typical Application |
|---|---|---|
Up to 1 inch | 22,000 – 24,000 RPM | Edge profiling, small grooves |
1 to 2 inches | 18,000 – 22,000 RPM | Stile and rail cuts, medium coves |
2 to 2-1/2 inches | 16,000 – 18,000 RPM | Large edge treatments, lock miters |
2-1/2 to 3-1/2 inches | 10,000 – 12,000 RPM | Horizontal raised panels |
A standard fence opening is too wide for clean routing. You must create a zero-clearance fence auxiliary face. Attach sacrificial MDF boards to your fence. Plunge the spinning cutter slowly into the MDF to create a custom profile opening. Minimizing the gap between the tool and the fence prevents stock from dipping into the pocket.
This eliminates snipe, chatter, and workpiece tear-away at the end of the cut. When setting the fence depth, use a precision straight edge to ensure the infeed and outfeed faces are perfectly coplanar. Any offset will cause the panel to bind or cut unevenly as it passes the cutter.
Establishing the final cut height requires precision. Use brass setup bars or digital depth gauges. The target thickness for the panel tongue is typically 1/4-inch (or exactly 0.250 inches). This fits standard stile and rail grooves perfectly. Adjust the height mechanism until the top of the tongue matches your target measurement.
Lock the height adjustment securely. Any vertical drift during the cut will ruin the panel. If you are using a back-cutter, the height adjustment dictates both the tongue thickness and the front reveal simultaneously. Take your time here; a 1/64-inch error will cause the panel to rattle or fail to fit entirely.
Never route your final panels without testing. Use scrap stock of the exact same thickness as your project material. Run the test piece through the complete multi-pass process. Test the tongue fit in the rail and stile groove. The fit must be snug but smooth.
You should be able to slide the panel in by hand with moderate pressure. If you need a mallet, it is too tight. Wood expansion will cause the frame to split at the corners. If it falls out under its own weight, it is too loose and will rattle. Adjust the bit height in micro-increments until the fit is perfect.
Removing too much stock at once violates the physics of material removal. A single pass leads to severe motor bog-down. The drop in RPM increases friction, generating excessive heat and deep burn marks. It also causes catastrophic tear-out on figured woods or difficult end grains like oak and hickory.
The lateral force of a single pass can easily kick the workpiece out of your hands, leading to severe injury. Multi-pass routing is mandatory. It preserves your tooling, protects your router motor, ensures operator safety, and guarantees a superior surface finish that requires minimal sanding.
Proper fence positioning dictates a successful multi-pass strategy. Start with the fence positioned forward. Expose only a small portion of the carbide. Take a shallow initial bite. Move the fence backward in precise increments for each subsequent pass.
Pass 1: Remove approximately 50% of the waste material.
Pass 2: Remove 30% of the remaining waste.
Pass 3: Remove 15% of the waste, bringing the profile close to final depth.
Pass 4 (Finishing): Remove the final 1/32-inch or less. This paper-thin pass cleans up any tool marks and leaves a glass-smooth surface.
Routing sequence matters immensely. Always route the two end-grain sides first. End-grain cuts are highly prone to blowout and splintering at the trailing edge where the cutter exits the wood. Follow this with the two long-grain sides.
The long-grain passes automatically clean up any blowout caused by the initial end-grain cuts. This sequence guarantees crisp, sharp corners without tear-out. To further prevent blowout on the end-grain passes, use a square push block or a piece of scrap wood as a backer board to support the wood fibers as they exit the cutter.
Burn marks result from friction. This is a trade-off between feed rate and RPM. If burning occurs on cherry, maple, or walnut, increase your feed speed slightly. Do not pause during the cut; keep the wood moving at a steady, consistent pace. If burning persists, lower the RPM slightly.
Pitch and resin buildup on the carbide edges also cause burning. Clean the tools regularly with specialized resin removers to maintain a cool cutting edge. A dirty bit cuts poorly and generates massive amounts of heat. Keep a brass brush and blade cleaner at your router station at all times.
Consistent stock registration prevents chatter. You must use featherboards. Apply vertical featherboards to provide downward pressure on the table. Apply horizontal featherboards to maintain inward pressure against the fence. This locks the workpiece in a consistent path.
Never rely solely on hand pressure. Human error leads to microscopic variations in pressure, which translate directly into chatter marks on the profile. For large panels, consider using a power feeder. A power feeder guarantees a perfectly consistent feed rate and absolute downward pressure, resulting in flawless cuts every time.
Uneven tongue thickness ruins panel assembly. This occurs when the panel lifts slightly during the cut. It is caused by inconsistent downward pressure or a warped workpiece. Correct this by using a custom spring-loaded hold-down jig or heavy-duty vertical featherboards.
Ensure your stock is perfectly flat before routing. Maintain heavy, consistent downward pressure directly over the cutting zone. If the panel is large and unwieldy, get an assistant to help support the outfeed side to prevent the panel from tipping as it leaves the table.
Large panel cutters are unforgiving. Strict safety protocols are absolute. You must use heavy-duty push blocks with high-friction pads. Keep your hands far away from the cutting zone at all times. Install clear bit guards above the cutter to deflect chips and prevent accidental contact.
Wear ANSI-rated safety glasses and hearing protection. Freehand routing with large panel tools is strictly prohibited. Always use a fence. If routing curved panels, you must use a starting pin and a heavy template, taking extremely shallow passes to maintain control.
Verify your router table's flatness using a precision straight edge and feeler gauges before starting any setup.
Clean and inspect your router's collet, removing all pitch and dust to ensure maximum gripping force.
Calibrate your variable speed dial to the correct RPM based on the specific diameter of your cutting tool.
Perform a complete test run on scrap stock to verify tongue thickness and profile alignment.
Invest in matched bit sets from reputable manufacturers to guarantee precise geometric alignment across all joints.
A: Large raised panel cutters (2-1/2 to 3-1/2 inches in diameter) must be run at significantly reduced speeds. Set your variable speed router between 10,000 and 12,000 RPM. Running these large tools at higher speeds causes severe vibration, burning, and dangerous centrifugal forces.
A: No. You must never use large panel cutters in a handheld router. The rotational mass and torque will violently twist the router out of your hands. These tools must only be used in a heavy-duty, table-mounted setup with a secure fence.
A: Prevent tear-out by using a strict multi-pass strategy. Take shallow cuts, removing only a small amount of material per pass. Always route the end-grain sides first, followed by the long-grain sides. Ensure your cutting edges are clean and razor-sharp.
A: A back-cutter is not strictly necessary, but it is highly recommended. It automatically machines a flush back profile to fit standard 1/4-inch frame grooves in a single setup. Without a back-cutter, you must perform a separate routing operation to create the back rabbet.
A: Double Roman Ogee profiles feature two distinct curves separated by a central bead, creating a more intricate and classic shadow line. Standard ogee profiles have a single, simpler S-curve. Double Roman profiles require more careful sanding but offer a highly refined, traditional aesthetic.
A: Burning is caused by excessive friction. This happens when the RPM is too high, the feed rate is too slow, or the carbide edges are coated in pitch. Lower the RPM, maintain a steady, continuous feed rate, and clean the cutters with a resin remover.
A: Never bottom out the shank in the collet. Insert the shank fully, then pull it back up approximately 1/16-inch before tightening the nut. This prevents the shank from locking into the bottom of the armature shaft as it expands from heat during use.


