
Views: 0 Author: Site Editor Publish Time: 2026-09-03 Origin: Site


Experiencing a tool slipping or shifting mid-cut presents a severe safety hazard on the shop floor. It ruins workpieces instantly and causes extreme thermal friction. In worst-case scenarios, it leads to catastrophic tool failure and flying carbide. Many operators blame the tool itself when a cutter slides out during a heavy pass. However, most slipping issues actually stem from improper collet engagement and poor cleaning habits. Defective tools rarely cause this specific failure. Chronic misuse permanently damages both the router spindle and the tooling.
Standardizing your tool-change procedures prevents these dangerous failures. Implementing the "bottom out and pull back" method ensures absolute grip stability. You must establish a strict framework for evaluating component wear. Knowing exactly when to clean, repair, or replace worn parts keeps your shop safe and your cuts precise. This guide breaks down the mechanical physics of collet systems and provides a foolproof installation sequence for daily operations.
The Pull-Back Rule: Inserting a bit fully and pulling it back 1/8” to 1/4” before tightening is mandatory to allow the collet to compress evenly without binding.
Torque Precision: Over-tightening distorts the collet and scores the bit shank; tightening should be firm and secure, not forced to the absolute physical limit ("killing it").
Component Lifespan: Router collets are wear items. Persistent slipping, even with proper technique, indicates metal fatigue requiring immediate replacement of the collet or the bit.
System Compatibility: Matching the exact shank size of woodworking router bits to the native collet size yields superior concentricity and grip compared to using reducer sleeves.
A successful tool installation requires zero runout, absolute grip stability, and no vibration. Achieving this baseline means understanding how the clamping mechanism actually functions under heavy cutting loads. A router collet does not operate like a simple drill chuck. It relies on specific mechanical physics to secure the tool during high-speed rotation.
The tapered collet system relies entirely on uniform compression. When you tighten the collet nut, it forces the collet down into a matching taper inside the router shaft. This downward movement compresses the slits machined into the collet body. The internal bore shrinks uniformly, gripping the cylindrical shank of the tool. Proper function requires clean, smooth surfaces on both the taper and the shank to achieve maximum friction. High-quality Router Collet Chuck Sets distribute this clamping force evenly across the entire inserted length, preventing localized pressure points that cause slipping.
To understand the clamping dynamics, consider the surface area contact. A standard collet provides 360-degree contact along the shank. If dust or resin interrupts this contact patch, the clamping force drops significantly. The mechanical advantage of the threaded nut multiplies your wrench torque into massive radial clamping pressure. This pressure must transfer directly to the shank without interference.
Operators often wonder why Woodworking Router Bits feature smooth, round shanks instead of keyed, flat-sided, or threaded designs. The answer lies in dynamic balance and high-speed physics. Routers operate at extreme speeds, often exceeding 24,000 RPM. Any asymmetry on the shank creates massive vibration, destroying the spindle bearings in minutes. A perfectly smooth, cylindrical shank guarantees absolute concentricity.
The uniform surface allows the collet to grip evenly, maintaining perfect center alignment. Keyed shanks work well for low-speed applications like drilling, but they introduce unacceptable runout at router speeds. The smooth shank relies entirely on friction, which is why maintaining the collet system is non-negotiable for safe operation.
Shank Design | Primary Application | High-Speed Balance | Runout Tolerance |
|---|---|---|---|
Smooth Cylindrical | Routers, CNC Spindles | Excellent (Up to 24,000+ RPM) | Minimal (<0.001") |
Keyed / Weldon | Milling Machines, Drills | Poor (Causes severe vibration) | Moderate |
Threaded | Specialty Arbors | Fair (Depends on thread class) | High |
Pushing a tool until it touches the absolute bottom of the router shaft causes immediate mechanical failure. As you tighten the collet nut, the collet is drawn downward into the taper. If the tool is already touching the bottom, this downward thrust forces the shank to push back against the collet. This resistance prevents the collet from seating deeply into the taper.
The result is a weak, localized grip that almost guarantees slipping during a cut. The collet binds against the nut rather than compressing around the shank. You might feel the nut get tight, but the actual clamping force on the tool remains dangerously low. This false sense of security leads to ruined parts and broken tools.
Proper installation requires a strict, repeatable sequence. Skipping steps introduces variables that lead to runout, chatter, and slipping. Follow this protocol every time you change a tool on the shop floor.
Always unplug the router before touching the tooling. If you operate a CNC machine, completely lock out and de-energize the spindle. Inspect the shank carefully under good lighting. Look for burrs, pitch, resin buildup, or scoring marks. Any surface irregularity compromises the grip.
Disconnect all power sources to the machine.
Remove the collet nut and collet from the spindle.
Inspect the internal spindle taper for rust, dust, or galling.
Clean the collet slits using a brass brush and approved solvent.
Blow out the assembly with clean, dry compressed air.
Compressed sawdust acts as a friction barrier. It prevents the necessary metal-on-metal clamping force required to hold the tool securely. A clean collet snaps into the nut easily and seats smoothly into the spindle taper.
Insert the tool into the collet until it bottoms out completely. Then, deliberately retract it 1/8-inch to 1/4-inch. This establishes the critical expansion gap. This gap allows the collet to draw down into the taper without the tool binding against the bottom.
For a foolproof method, drop a small rubber O-ring into the collet cavity. The O-ring acts as a physical spacer. It automatically prevents the shank from bottoming out against the steel shaft. This simple trick saves time and eliminates guesswork during fast tool changes.
Hand-tighten the collet nut first until it firmly holds the tool in position. This step ensures your 1/8-inch pull-back gap does not shift or close when you transition to using wrenches. Securing the position by hand guarantees the expansion gap remains intact during the final torque application.
If the nut binds or feels gritty during hand-tightening, stop immediately. Remove the assembly, clean the threads, and inspect for cross-threading. The nut should spin freely until the collet begins to compress against the shank.
Apply the correct torque using firm pressure. Never over-torque or use cheater bars to force the nut. Use dual wrenches whenever possible instead of relying on a single spindle lock button. Dual wrenches provide a mechanical advantage and better control. They also reduce lateral strain on the internal spindle bearings.
CNC router spindles often require specific torque wrenches for ER collets, whereas handheld routers rely on standard open-end wrenches. A good rule of thumb for handheld routers is to tighten until you feel solid resistance, then give it one final, firm push. Do not use your body weight to lock it down.
Maintaining old, worn tooling costs more than upgrading to high-precision replacements. Worn components ruin expensive workpieces and pose severe safety risks. You must know how to identify metal fatigue and wear patterns.
Inspect your collets regularly for signs of failure. Look for "bell-mouthing," a condition where the top of the collet becomes wider than the bottom. Check for snapped spring slits, inner surface scoring, or permanent deformation. Treat collets as consumable items.
Wear Indicator | Visual Sign | Action Required |
|---|---|---|
Bell-Mouthing | Top opening wider than bottom | Replace immediately |
Scored Bore | Deep scratches inside collet | Replace immediately |
Snapped Slits | Cracked or broken spring steel | Replace immediately |
Resin Glaze | Brown/black baked-on residue | Clean with solvent |
Industry standards recommend replacing collets every 400 to 600 hours of heavy use to maintain optimal clamping force. If you run a production shop, schedule collet replacements just like you schedule lubrication and bearing checks.
A spinning tool inside a loose collet causes irreversible damage. It creates galling, pitting, and scoring on the shank steel. Once a shank is scored or shows heat-induced discoloration (bluing), you must retire the tool immediately. A damaged shank will inevitably ruin new collets.
Never attempt to sand or file a scored shank back to a smooth finish. You will destroy its concentricity and introduce massive runout. The cost of replacing a damaged tool is always lower than the cost of replacing a ruined spindle or dealing with a shop injury.
Consider the return on investment of premium collet systems. High-tolerance aftermarket collets offer superior grip compared to standard factory parts. Precision ER collets for CNC machines provide minimal runout, often guaranteed below 0.0004 inches.
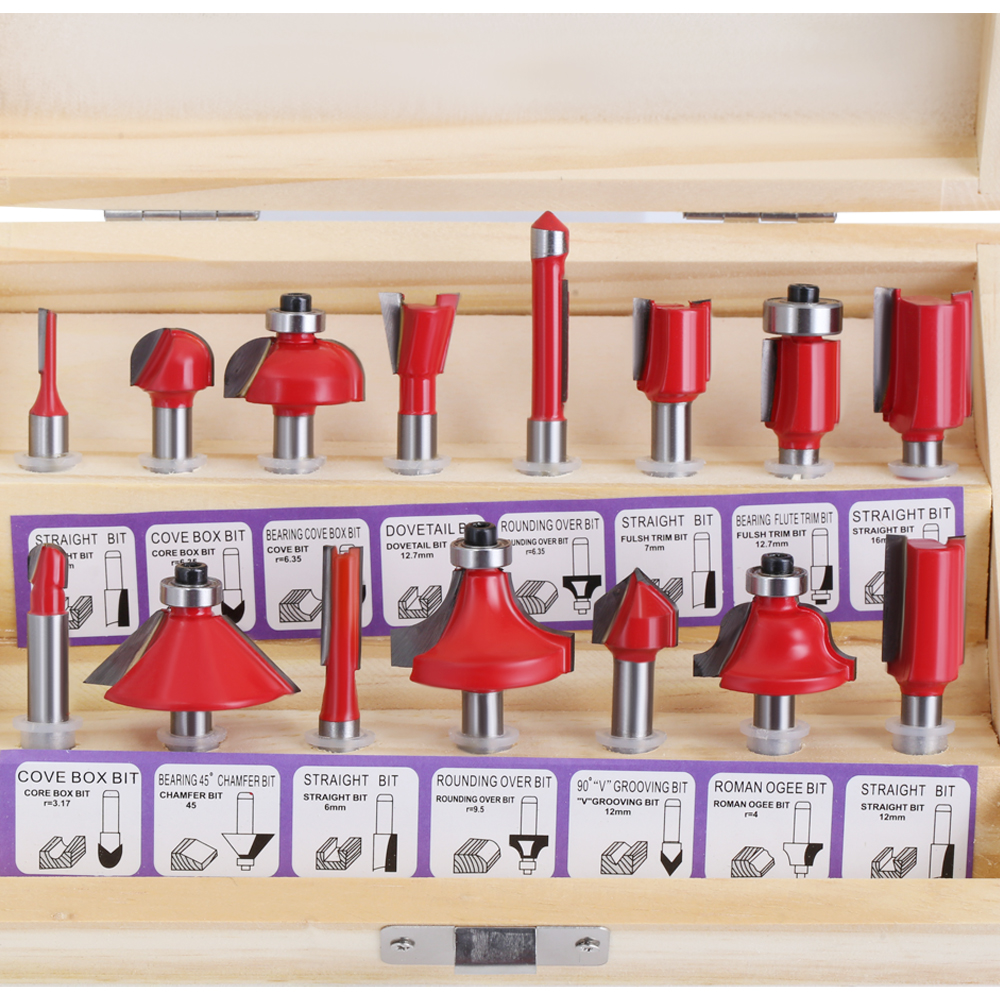
Investing in premium collets extends the life of your expensive Router Bits by preventing slippage and reducing vibration. Less vibration means cleaner cuts, longer edge life, and less wear on the router bearings.
Even experienced operators fall into bad habits. Understanding the mechanics behind common mistakes helps you avoid dangerous situations on the shop floor.
Under-tightening leads to immediate slipping and severe safety hazards. However, chronic over-tightening is equally destructive. Forcing the nut past its intended torque permanently distorts the collet taper. It strips the delicate spindle threads. It can even crush the hollow sections of certain large-diameter shanks.
Aim for firm, secure pressure without using excessive force. If you find yourself needing a cheater bar to stop a tool from slipping, your collet is already worn out and needs replacement.
A tool slipping during a cut creates intense friction heat, instantly burning the wood. It often triggers sudden, violent workpiece kickback. The shifting depth ruins templates and jigs. Lateral forces can cause catastrophic shank shearing, sending sharp carbide flying across the shop.
Preventing the slip is your only defense against these hazards. Always perform a test cut in scrap material after changing a tool to verify the grip and depth setting before committing to the final workpiece.
Avoid using 1/2-inch to 1/4-inch adapters whenever possible. Adapters introduce a secondary layer of tolerance stacking. This increases runout and significantly raises the likelihood of slipping under heavy loads.
Always purchase tools with native shank sizes that match your primary collet. If you must use an adapter, ensure it is a high-quality, slotted steel bushing, and never use split brass sleeves for high-RPM routing.
Dust buildup causes "dry" metal-on-metal binding on the thread surfaces. This tricks you into thinking the nut is tight when the collet is actually loose. Clean the assembly regularly with pitch remover.
Apply a dry lubricant like PTFE or graphite only to the outside of the collet taper and the threads. Never apply lubricant to the inside bore where it contacts the shank. The inside must remain completely dry to maintain friction.
Slipping tools are the direct result of bottoming out, over-tightening, or using worn-out components. If your technique is flawless—using the 1/8-inch pull-back rule and hand-tightening first—and slipping persists, the collet or the shank has failed. Take the following steps to ensure safety and precision in your shop:
Inspect your current collets immediately for bell-mouthing or snapped slits.
Discard any tools with scored, galled, or blued shanks.
Clean your spindle tapers and collet nuts with pitch remover and compressed air.
Invest in fresh, high-precision collets to establish a reliable, safe baseline for future projects.
A: Slipping is usually caused by the tool bottoming out inside the spindle, preventing the collet from compressing fully. It also results from compressed sawdust inside the collet slits or a worn-out collet taper that has lost its elasticity.
A: Tighten the collet nut with firm, secure pressure using standard wrenches. Do not use excessive body weight, extension pipes, or cheater bars. Over-tightening distorts the collet and damages the spindle threads.
A: You can use a reducer sleeve, but it is not recommended for heavy loads. Adapters introduce tolerance stacking, which increases runout and the risk of slipping. Buying tools with native shank sizes is always safer.
A: Smooth shanks guarantee absolute concentricity and dynamic balance. Routers spin at up to 24,000 RPM. Any asymmetry from keys or threads causes massive vibration, destroying the spindle bearings and ruining cut quality.
A: Insert the tool until it bottoms out, then pull it back 1/8-inch to 1/4-inch. At a minimum, at least 3/4 of the shank length must be gripped by the collet to ensure safe operation.
A: Collets are consumable wear items. In a production environment, replace them every 400 to 600 hours of use. For hobbyists, replace them immediately if you notice bell-mouthing, scoring, or persistent slipping.
A: Apply a dry lubricant like PTFE or graphite to the outside taper and the threads to prevent binding. Never lubricate the inside bore. The inside must remain completely clean and dry to grip the shank properly.


