
Views: 0 Author: Site Editor Publish Time: 2026-07-27 Origin: Site


Few things feel as devastating as ruining a nearly finished hardwood project. You spend hours measuring, cutting, and sanding, only to destroy the workpiece during the final routing stage. Tear-out, stubborn burn marks, and violent chatter can instantly turn premium lumber into scrap. These defects rarely stem from poor operator technique alone.
The real variables dictate success long before you power on the tool. The physical geometry, material quality, and profile selection of your tooling act as the definitive factors separating an amateur finish from a professional-grade edge. Simply put, you cannot achieve flawless profiles using subpar equipment.
We will explore an evidence-based framework for evaluating and selecting the proper tools for your shop. You will learn how flute design influences wood fibers and why matching optimal RPMs prevents scorching. By the end, you will know exactly how to apply the right strategies to guarantee consistent, clean edge quality on every project.
Clean edges rely on a combination of carbide density, shear angles, and optimal RPM matching.
Upgrading from 1/4-inch to 1/2-inch shanks dramatically reduces vibration (chatter), leading to smoother profiles.
Different edge types (e.g., a roman ogee router bit vs. a straight router bit) require distinct feed rates and depth-of-cut strategies to prevent wood burning.
Investing in individual, high-quality bits tailored to specific project needs often yields a higher ROI than purchasing massive, low-grade bulk sets.
Understanding tool geometry helps you predict how a cutting edge interacts with wood grain. Manufacturers engineer these profiles to solve specific milling challenges. The physical design of the flutes dictates whether the tool slices cleanly or tears aggressively.
First, we must evaluate shear angle and flute design. Straight flutes chop directly into wood fibers. This perpendicular impact often causes tear-out, especially on end grain. Angled flutes solve this problem. They slice wood fibers gradually, much like a skew chisel operates on a wood lathe. This shearing action reduces impact force. It leaves a remarkably smooth surface behind.
Next, consider how flute count impacts your work. You will typically choose between two-flute and three-flute designs.
Two-Flute Designs: These provide larger gullets for fast chip clearance. They allow faster feed rates but leave wider spacing between each cut.
Three-Flute Designs: These increase the cuts per revolution. You must feed the material slightly slower. However, they deliver a vastly superior finish quality.
Finally, anti-kickback designs play a massive role in both safety and cut quality. These designs feature enlarged bodies behind the cutting edge. The added mass limits the depth of bite per revolution. If you push the wood too fast, the body bumps against the material. This prevents the cutting edge from grabbing too deeply. It functions as a critical safety feature. Simultaneously, it acts as a smoother-cutting mechanism by forcing a controlled feed rate.
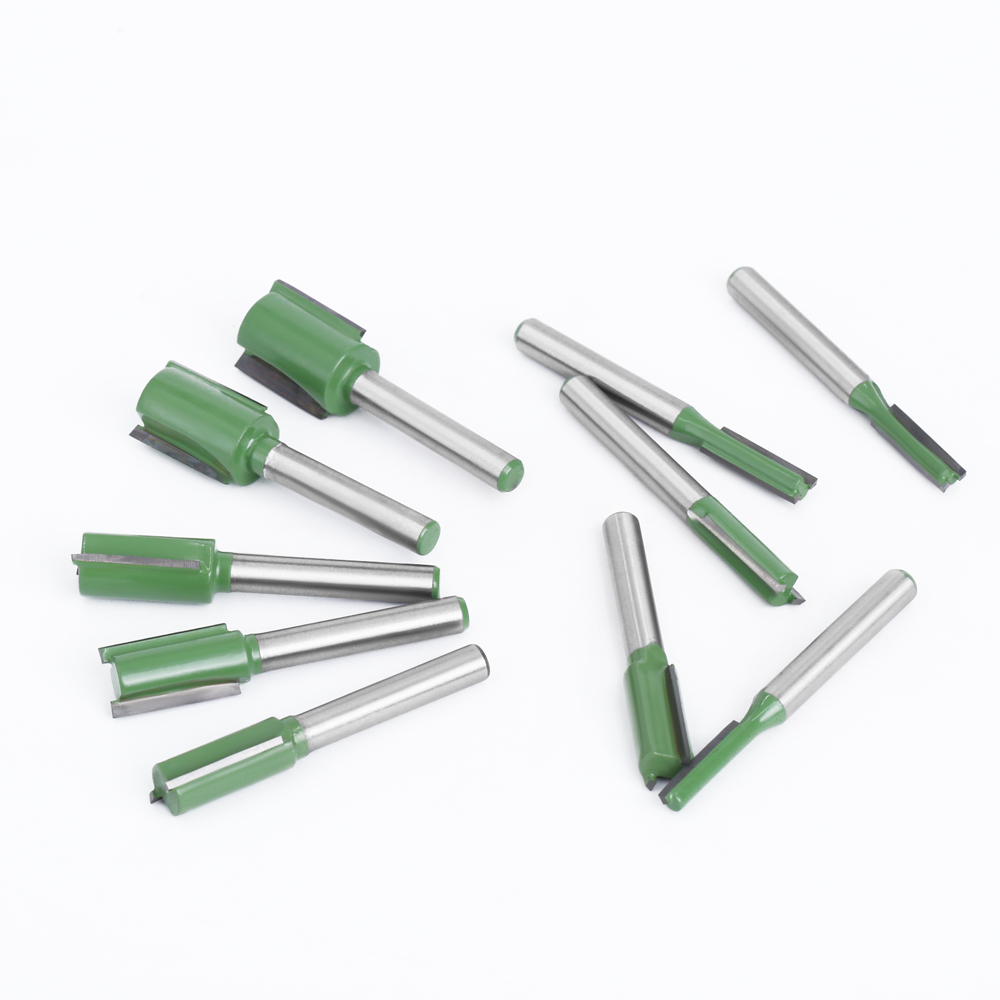
Woodworkers often underestimate the importance of shank diameter. Shank size governs the physical stability of the tool during high-speed rotation. A 1/2-inch shank offers four times the mass of a 1/4-inch shank. This extra mass provides superior heat dissipation. It also dramatically reduces deflection under heavy loads. Less deflection directly translates to cleaner edges and less chatter. If your collet accepts 1/2-inch shanks, you should always choose them.
Material quality defines tool longevity. You generally choose between High-Speed Steel (HSS) and carbide-tipped options. HSS tools take a sharper initial edge. However, they lose their retention rapidly when cutting hardwoods, MDF, or plywood composites. Heat destroys HSS edges quickly.
Carbide-tipped tools operate differently. Micro-grain carbide withstands extreme heat and abrasion. High-quality carbide holds an edge up to fifty times longer than HSS. You should view micro-grain carbide as the mandatory baseline for serious woodworking. It requires a larger upfront investment but saves immense frustration over time.
Bearing quality also dictates final edge results. A frozen bearing ruins a workpiece instantly. Unshielded bearings attract dust and resin. They seize up and spin against the wood, leaving deep burn marks along the guide edge. Shielded or fully sealed bearings keep dust out. They spin freely, protecting your template or workpiece from friction burns.
Router Shank Comparison Summary
Feature | 1/4-Inch Shank | 1/2-Inch Shank |
|---|---|---|
Mass & Stability | Low. Prone to flexing under load. | High. Resists deflection effectively. |
Vibration (Chatter) | Higher risk on dense hardwoods. | Minimal. Smooth rotation yields clean cuts. |
Heat Dissipation | Poor. Heat travels quickly to the cutting edge. | Excellent. Mass absorbs and dissipates heat. |
Best Application | Light detail work, laminate trimming. | Heavy stock removal, panel raising, edging. |
Building a capable tool library starts with understanding profile applications. High-quality woodworking router bits handle distinct tasks. Selecting the wrong profile for a specific joint guarantees a sloppy result.
The standard straight router bit serves as the workhorse of any shop. You use it for creating dados, plowing grooves, and truing up rough edges. However, not all straight profiles perform equally. When evaluating these tools, look for spiral up-cut or down-cut variations. An up-cut spiral pulls wood chips quickly out of a deep mortise. A down-cut spiral pushes fibers downward, preventing surface tear-out on delicate veneers. Understanding this difference helps you dictate exactly where chip clearance and tear-out prevention occur.
For decorative finishing, the roman ogee router bit remains unmatched. It creates classic, S-shaped architectural profiles ideal for traditional furniture and crown molding. The implementation reality of this complex curve requires patience. You cannot carve the full profile in one pass. It requires multiple shallow passes. Forcing one deep cut creates intense friction, leading to severe burning along the intricate curves.
Flush trim and chamfer profiles handle joinery refinement. You rely on them for edge joining, template routing, and easing sharp corners. Flush trim tools ride along a bottom or top bearing. They duplicate a template shape perfectly onto rough stock. For ultimate success, seek out spiral flush trim designs. They offer the highest quality finish on difficult or highly figured grain patterns. Chamfer tools create angled bevels. They soften sharp edges, preventing splintering on high-traffic furniture pieces.
Owning premium tools solves only half the equation. Execution matters just as much. Improper setup destroys both the tooling and the lumber. You must master feed rates, rotation speeds, and pass depths.
First, respect the RPM to bit diameter ratio. Running a massive cutter at maximum speed generates dangerous kinetic energy and extreme friction. You must match the tool speed to its physical size.
Small profiles (under 1 inch): Run at 22,000 to 24,000 RPM.
Medium profiles (1 to 2 inches): Reduce speed to 18,000 to 20,000 RPM.
Large profiles (2 to 2.5 inches): Drop speed to 16,000 RPM.
Panel raising profiles (over 3 inches): Never exceed 12,000 RPM.
Slowing down large panel-raising cutters prevents the outer edge from traveling too fast. This simple adjustment eliminates scorch marks on cherry and maple.
Next, evaluate feed direction. Standard practice dictates feeding material against the cutter's rotation. This provides control. However, highly figured woods often splinter when routed conventionally. Climb cutting offers a strategic alternative. You feed the wood with the rotation direction. This slices fibers before they can lift. It prevents tear-out on difficult burls. Be warned: climb cutting poses severe safety risks. The cutter actively tries to grab and throw the wood. You should only attempt this on a secure router table using heavy feather boards and push blocks. Never climb cut with a handheld tool.
Finally, adopt the "hogging versus finishing" pass rule. Never attempt to remove all material at once. Set your fence or depth guide to leave 1/16-inch of waste material on the initial pass. This hogging pass does the heavy lifting. Heat and minor tear-out might occur here. Then, adjust to your final dimension. Because the finishing pass removes only a tiny sliver of wood, it requires minimal force. This two-step logic yields a glass-smooth edge every time.
Tool catalogs overwhelm most woodworkers. You see massive boxed sets promising dozens of profiles for a low price. This presents a dangerous false economy. Budget 50-piece sets use cheap steel, poor balancing, and thin carbide. Most of those profiles will sit unused for decades. The few you do use will dull instantly.
Instead, weigh the benefits of individual purchases. Buying three to five premium cutters tailored to your immediate needs guarantees precision. It also ensures longevity. A single high-end flush trim cutter will outlast an entire bargain set.
Apply strict evaluation lenses when reading manufacturer specifications. Look for C3 or C4 micro-grain carbide. These grades feature smaller carbide particles tightly bonded together, resisting impact damage. Check for PTFE anti-stick coatings. These specialized baked-on finishes prevent pitch and resin buildup, keeping the tool running cool. Finally, verify precision balancing. Premium manufacturers balance their cutters using computers to eliminate microscopic vibrations.
Your next step requires action in the shop. Audit your current collection. Unplug your equipment and inspect the cutting edges. Feel for nicks or rounded bevels. Spin every bearing to check for grinding noises or stiffness. Discard cutters showing bearing failure or severe dullness. Prioritize replacing your three most-used profiles with premium, 1/2-inch shank alternatives. A targeted upgrade strategy transforms your edge quality immediately.
Flawless edge quality is never an accident. It is not solely dependent on operator skill. Superior results demand strict adherence to tooling geometry, material capability, and machine setup. When you respect the mechanics of shear angles and shank mass, your workpieces emerge smooth and burn-free.
You now possess a clear framework for evaluating cutter quality. Remember to prioritize C3 or C4 micro-grain carbide. Always utilize the two-pass finishing rule. Treat feed rates and RPM matching as mandatory safety protocols rather than optional suggestions.
Take time today to audit your current tooling setup. Identify the dull tools causing chatter in your shop. Start replacing low-performing equipment with premium 1/2-inch shank alternatives. By exploring specific, high-quality profile catalogs, you invest directly in the professional finish of your future woodworking projects.
A: Look for three primary indicators. First, check the wood for dark burn marks, which indicate friction rather than slicing. Second, notice if you have to push the router harder to feed the material. Increased feed resistance means the edge is blunt. Finally, carefully drag a fingernail across the cutting edge while unplugged. A sharp edge catches the nail instantly; a dull one lets it slide.
A: Yes, smaller ogee profiles work in handheld routers. However, safety and base stability are critical concerns. Because this profile removes significant material across a complex curve, the tool easily tilts if not supported properly. For larger architectural ogee profiles, you should always use a router table. A table guarantees a perfectly square cut and prevents tipping.
A: Horizontal lines often indicate a worn or sticking bearing. If the bearing hesitates, it scars the wood. Vertical chatter marks point to router runout (wobble in the collet) or a bent shank. Alternatively, these lines occur if you pause your forward motion while feeding. The spinning cutter continuously rubs the stationary wood, leaving a visible pause-mark.
A: It depends on the initial cost of the tool. Resharpening a cheap, mass-market cutter costs more than replacing it. However, professional sharpening is highly cost-effective for premium, large-diameter cutters or expensive spiral profiles. A reputable sharpening service restores the proper bevel angles. Keep in mind that sharpening slightly reduces the overall diameter of the tool.


