
Views: 0 Author: Site Editor Publish Time: 2026-07-31 Origin: Site


Reproducing exact historical trims, custom architectural moldings, or consistent cabinet edging presents a demanding woodworking challenge. Craftsmen frequently battle tear-out, severe wood burning, and frustrating dimensional drift when milling extended lengths of lumber. Overcoming these hurdles requires more than just patience. High-quality molding router bits rely on precise carbide geometry, optimal mass distribution, and reliable mechanical guides. These specialized tools effectively guarantee repeatable, pristine results across long runs of dense hardwood stock.
This comprehensive guide covers how to properly evaluate core tooling mechanics for your shop. We will explore how to confidently choose between using dedicated single-pass cutters and creatively combining multiple foundational profiles. Finally, you will discover proven strategies to mitigate operational risks during heavy milling tasks, ensuring a flawless finish every time.
Mechanical Precision: Guide bearings and balanced bit mass dictate the consistency of the cut, reducing vibration and runout.
Profile Strategies: Complex designs can be achieved via single-pass specialized bits (like a roman ogee router bit) or by combining foundational shapes (like bead and flute router bits).
Tooling Evaluation: Micro-grain carbide and anti-kickback designs are critical indicators of bit longevity and operational safety for continuous use.
Operational Reality: Deep architectural profiles mandate the use of a variable-speed router table and multiple shallow passes to maintain finish quality.
Understanding the physics behind cutting tools helps you achieve professional woodworking results. Router bits do not simply smash through wood grain. They rely on engineered cutting angles and rotational mass to slice materials cleanly.
The cutting edge geometry determines how smoothly a tool removes material. Premium cutters utilize a specific attack angle. This shear angle slices wood fibers rather than chopping them bluntly. Slicing prevents severe tear-out on difficult or highly figured grain patterns. When routing woods like curly maple, a proper shear angle becomes absolutely essential. It lifts the waste chip up and away from the cut path. This prevents heat buildup and protects the delicate decorative edge.
Maintaining a uniform depth of cut across a ten-foot board requires mechanical assistance. Integrated guide bearings solve this problem. These bearings ride smoothly along the unrouted edge of your stock or a dedicated template. By locking the horizontal depth, bearings prevent dimensional drift. If you press too hard against the fence, the bearing stops the cutter from digging deeper. This guarantees your profile looks identical at both ends of a long run.
Woodworkers must respect the fundamental physics of routing. Large profile cutters remove massive amounts of wood per rotation. You should always choose bits utilizing a 1/2-inch shank for architectural work. Consider these mechanical benefits:
Vibration Absorption: Thicker shanks resist deflection under heavy side loads.
Chatter Reduction: Increased mass stabilizes the cutter, yielding a glass-smooth finish.
Heat Dissipation: More steel mass draws destructive heat away from the brazed carbide tips.
A 1/4-inch shank simply lacks the structural integrity for heavy molding profiles. It will flex under pressure, causing a rippled finish and risking catastrophic tool failure.
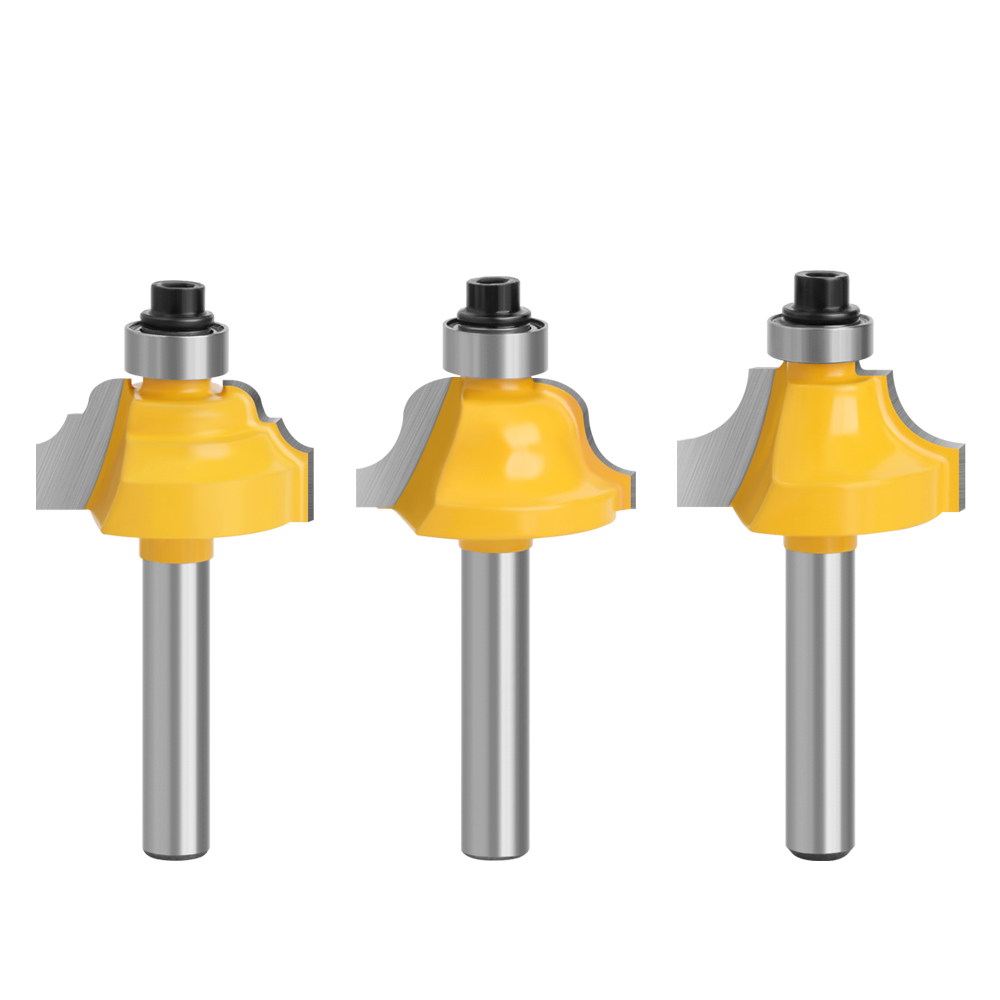
Creating decorative edges typically involves choosing between two distinct tooling strategies. You can use one massive bit to cut the entire shape. Alternatively, you can stack several smaller cuts to build the final design. Both methods offer unique advantages for specific workshop scenarios.
Single-setup tooling provides unmatched shop efficiency. Production environments rely heavily on these tools. A dedicated bit cuts the entire decorative shape in one sequence. Take the classic roman ogee router bit as a perfect example. It represents an industry-standard edge profile for traditional trim. Setting up this single cutter delivers immediate, repeatable results. You lock the height, set the fence, and run the material. This approach minimizes human error and significantly speeds up production runs.
Sometimes you need to replicate historical trims or proprietary architectural designs. Buying a custom-ground knife for one project is usually too expensive. Instead, you can employ the strategy of stacking cuts. Woodworkers frequently sequence foundational shapes to build massive profiles. By carefully combining bead and flute router bits, you can replicate complex 17th-century period moldings. You route a flute on one edge, flip the board, and add a bead. This modular technique unlocks infinite design flexibility without requiring expensive custom tooling.
Choosing your method depends entirely on your project volume and design requirements. Review the comparison below to guide your tooling strategy.
Strategy | Setup Time | Predictability | Design Flexibility | Tooling Cost |
|---|---|---|---|---|
Dedicated Bits | Fast (Single Setup) | Extremely High | Locked to one specific shape | High individual cost |
Multi-Bit Combinations | Slow (Multiple Setups) | Moderate (Requires precision) | Infinite custom possibilities | Lower overall shop investment |
Not all cutting tools deliver the same performance. When milling linear feet of trim over several weeks, you need industrial reliability. Evaluating core manufacturing materials helps you identify tooling capable of surviving continuous professional use.
Standard carbide tips dull quickly under heavy production loads. You should actively look for tools featuring micro-grain carbide. Micro-grain carbide consists of much smaller, tightly packed particles. This density allows the manufacturer to grind a substantially sharper edge. More importantly, it holds that edge far longer. Maintaining a sharp edge proves critical when matching trim pieces routed weeks apart. A dull bit compresses wood fibers, changing the final dimension slightly. Micro-grain options prevent this costly dimensional drift.
Operational safety must remain your primary concern when routing. High-mass body designs feature prominent steel shoulders behind the carbide cutting edge. This anti-kickback design limits the bite of the cutter per revolution. It physically prevents the tool from grabbing too much wood at once. Limiting the bite significantly reduces the risk of the tool catching and violently rejecting the workpiece. This geometry protects your hands and preserves your expensive hardwood stock.
Heat acts as the ultimate enemy of carbide tooling. Friction from cutting naturally generates heat. Resin and pitch from the wood quickly bake onto hot steel surfaces. This buildup creates even more friction, starting a vicious cycle. Premium bits feature non-stick PTFE coatings. These industrial coatings prevent pitch buildup entirely. By rejecting resin, the tool runs dramatically cooler. Cooler operation eliminates ugly wood burning and significantly extends the usable life of the carbide tips.
Having the best tooling means nothing if you lack proper operational technique. Large profile cutters demand immense respect. Implementing strict safety protocols and correct milling procedures guarantees optimal finish quality.
You must never run large molding bits freehand. A handheld router lacks the stability required to manage the intense rotational forces. These aggressive cutters mandate a highly rigid router table setup. Your table must feature a heavy, perfectly flat top and a sturdy, adjustable fence. Feather boards are also mandatory. They hold the stock firmly against the fence and table, keeping your hands safely away from the cutter.
Spinning a massive three-inch diameter cutter at 24,000 RPM creates a dangerous situation. The outside edge moves far too fast, which instantly scorches the wood. You must dial down your router RPMs for larger bits to maintain a safe tip speed. Follow these general guidelines:
Bits up to 1-inch diameter: 22,000 to 24,000 RPM.
Bits from 1-inch to 2-inch diameter: 18,000 to 22,000 RPM.
Bits from 2-inch to 2.5-inch diameter: 12,000 to 16,000 RPM.
Bits over 2.5-inch diameter: 8,000 to 12,000 RPM.
Slowing the router prevents burns and ensures the tool operates within safe mechanical limits.
Milling deep architectural profiles requires patience. You cannot force a full-depth cut in a single pass. Attempting this strains the router motor, induces massive chatter, and severely degrades the finish. You must take sequential shallow passes. Remove only 1/8-inch to 1/4-inch of material at a time. Move the fence back slightly for each pass. For your final pass, leave just 1/16-inch of material. This light final cut removes any previous machining marks, leaving a flawless, sanding-free surface.
Selecting the right cutters involves assessing your current equipment and planning your long-term shop needs. Following a structured purchasing framework prevents you from buying tools you cannot use.
Before buying large profile cutters, verify your equipment capabilities. These bits demand serious horsepower. A minimum of 2.25 HP is required, while 3+ HP is highly recommended for continuous molding work. A weak router will bog down, resulting in burned wood and rough cuts. Additionally, confirm your collet size. Ensure your machine accepts 1/2-inch shanks, as 1/4-inch collets cannot safely handle heavy molding cutters.
Building a tooling library takes time. We recommend a hybrid purchasing approach. Buy core profile sets for general daily trim work. Sets offer excellent value for standard round-overs and coves. However, you should source individual, high-end bits for specific restoration jobs. When you need to match complex architectural molding, buy the exact premium bit required. This strategy balances your budget while ensuring you have top-tier tools for critical finish work.
Always review technical specifications before finalizing your purchase. Use this quick validation checklist:
Confirm a 1/2-inch shank diameter for maximum stability.
Verify the manufacturer sells replacement bearings for that specific model.
Check the carbide thickness. Thicker carbide allows for future professional resharpening.
Ensure the bit features an anti-kickback body design.
Creating consistent decorative profiles requires a deep understanding of cutting mechanics. The resulting consistency of your wood profile links directly to tool geometry and material quality. Micro-grain carbide, proper shear angles, and heavy anti-kickback bodies form the foundation of premium results. These features minimize vibration and eliminate tear-out on difficult grain.
However, successful molding relies just as much on rigid setup and careful feed execution. A heavy router table, variable speed control, and multi-pass techniques remain non-negotiable requirements. You must respect the physics of removing large amounts of hardwood.
Before starting your next trim or cabinetry project, audit your current router table setup. Verify your machine horsepower and review your tooling specifications. Taking time to prepare your equipment ensures flawless, repeatable moldings across your entire project.
A: No, you should never run large molding cutters freehand. Doing so introduces severe safety risks due to intense rotational torque. Handheld routing lacks the stability needed to keep the tool perfectly vertical. Furthermore, you cannot control feed rates consistently by hand, which inevitably causes severe wood burning and ruined profiles.
A: Burn marks result from excessive friction. First, you must reduce your router RPMs based on the bit diameter to lower the tip speed. Maintain a steady, consistent feed rate without pausing mid-cut. Finally, ensure your bit is completely clean. Resin buildup causes extreme friction, so use a pitch cleaner regularly.
A: It depends on your production needs. A single complex bit provides unmatched speed and predictability for repetitive, high-volume production. Combining simpler profiles offers infinite versatility for custom work. If you frequently design unique architectural pieces, combining foundational shapes saves money and expands your design possibilities.


